Checklist Setup
The Setup process takes is about 15 minutes and requires you to setup an iPad in a centralized location of your choice. We clone the most used checklist so you can get started quickly but you can create your own at any time. Each list or task can be completed independent of the other tasks shown on the screen. To Get Started follow the Steps Below:
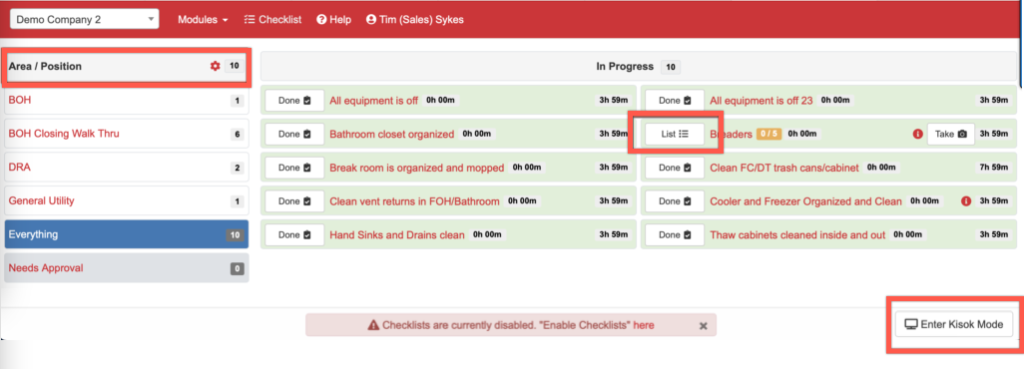
Step 1: Login to Checklisthere to access the homepage for Checklist. The Areas/Positions are listed on the left and the Checklist to be completed show on the right side. To lock the iPad to checklist click Kiosk mode in the lower right which will require an admin pin to unlock the screen.

Step 2: Manage or Create a Checklisthere. The Left side is your categories you want in your area or position. Tap “New Area/Position” to create a new one. The Right Side is your Checklist. Modify a checklist by tapping the edit icon or create a Checklist by tapping “New Checklist” on the right side. To move a checklist to a different category hold and drag the + on the checklist you want to move to the left side. How to Video.

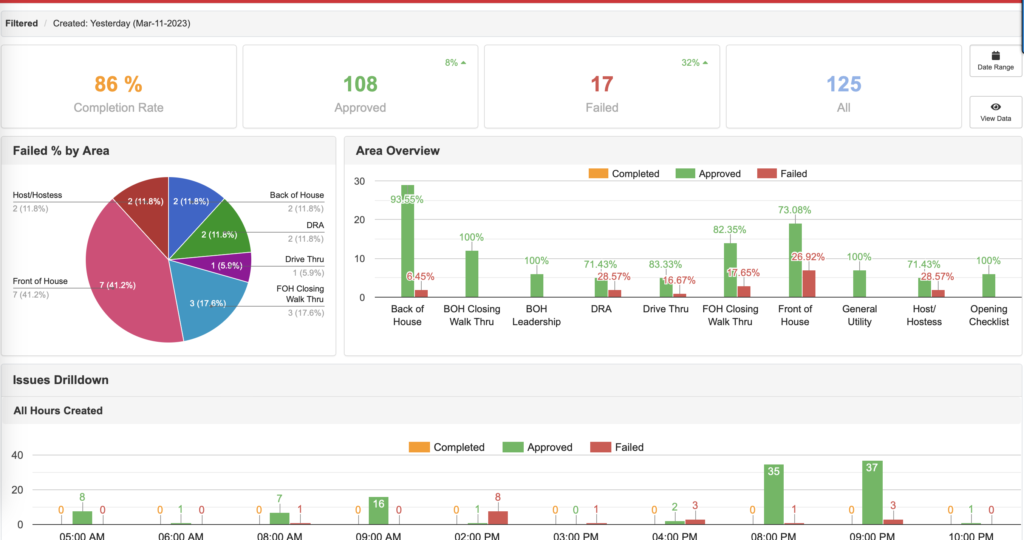
Step 3: View the Checklist Dashboard to see your team’s task completion overview. This shows areas of opportunity in your store:

Direct Tasks Setup
Directtasks allow managers to assign a “single” task to an employee for something that needs to be done immediately. The task can be a direct task or added to an existing Checklist. The task is assigned from the mobile app and both parties are notified of the status of the tasks through the Process. Get Started with Direct Tasks by following the Step below:
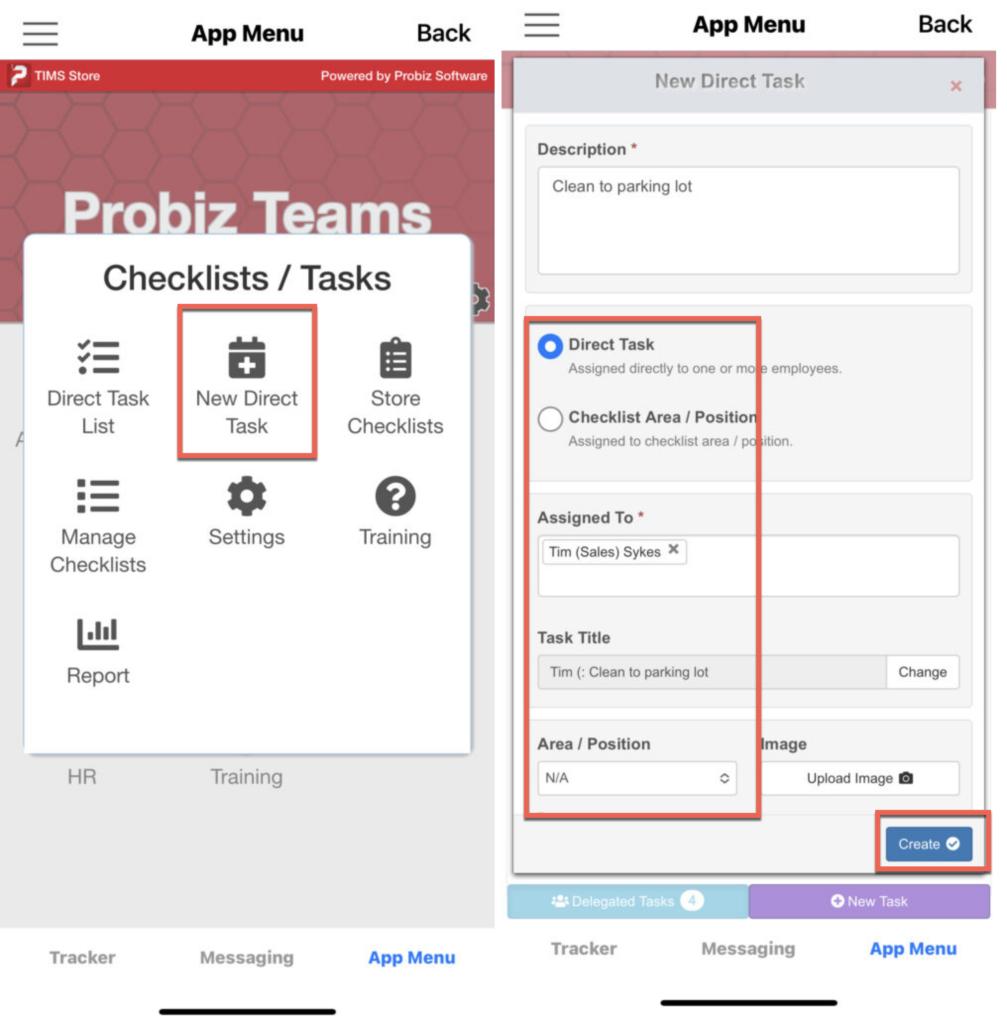
Step 1: Creating a Direct Task: Login to the mobile app and go to App Menu>Checklist>New-Direct-Tasks. Fill out the information on the direct task screen. The task can be assigned to one or more people or to an area or position. Once the task is filled out hit “create” to assign the task and send a notification via the mobile app.

Checklist Videos