HR Module Setup
The setup process takes about 20 minutes. You will need an iPad. We created your HR module with the most commonly used forms and we recommend using it this way until you’re familiar with the software.To Get Started follow the Steps Below:
Step 1: Have the Operator allow 3rd party access for Probizon the Corporate website. We sent you email instructions after signing up. When done, your employees are pulled into HR and you will have access to the HR Homepage here system. This could take 2 hours. (Video)
Step 2: Check your EmployeePositions by going to Modules>HR>Employees here. Use the edit icon to change them if needed. (Video)

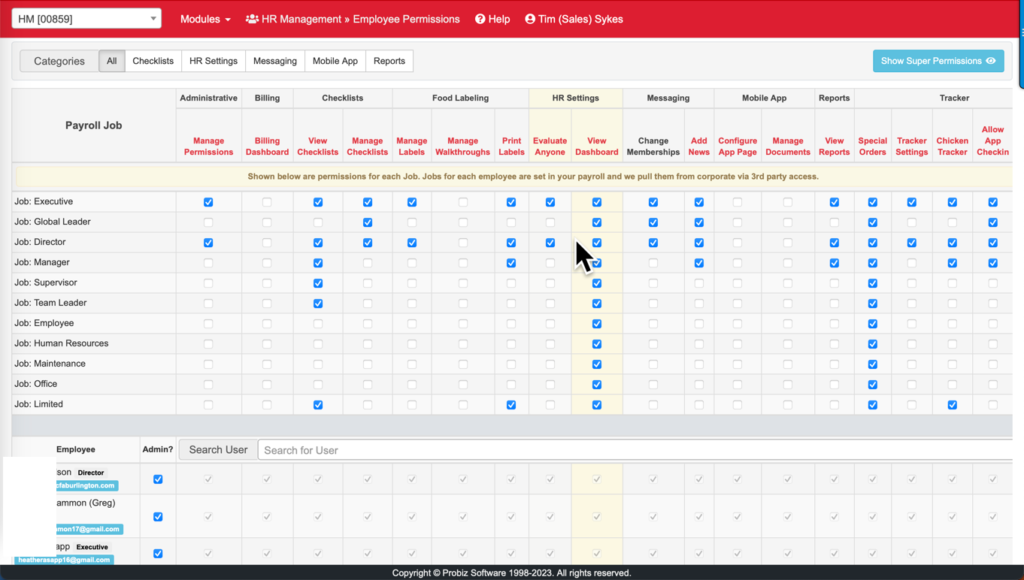
Step 3: Set your AdminPermissions here. Admins can change things in the platform and is normally given to the HR Lead, Operator and GM. Use the top half of the screen to set job based permissions and the lower half to set employee based permissions per module. Step 3 Video
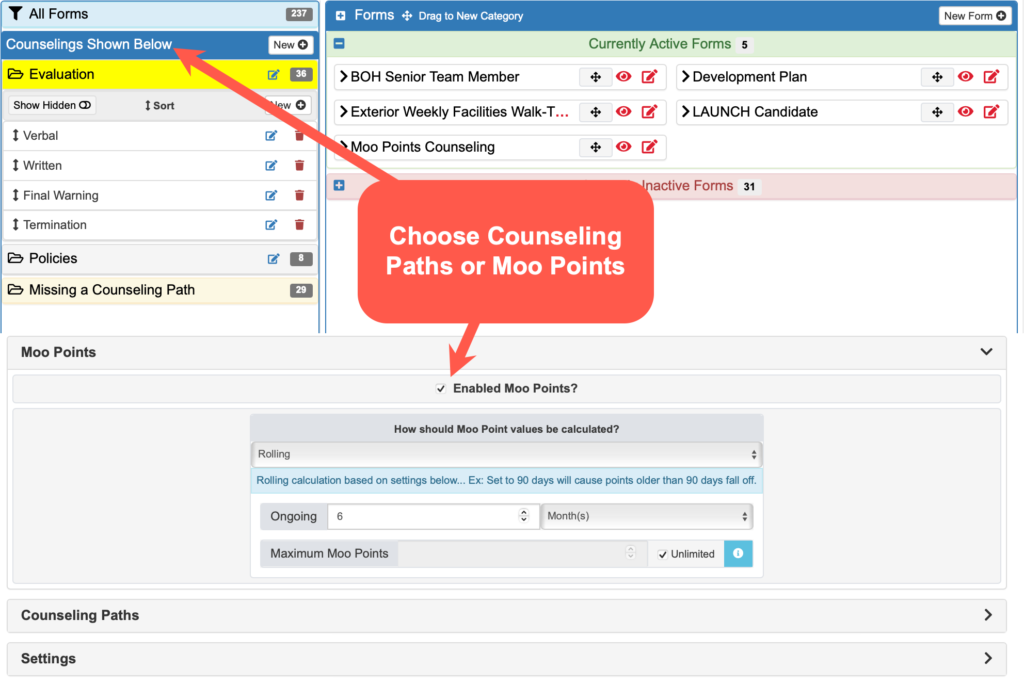
Step 4: Choose the Disciplinary Action Method –Turn on Moo Points to trigger actions here or Use Counseling Paths here. The differe like Verbal, Written, Final warning to trigger actions. Most everyone that signs up for HR now uses the point system which means once an employee reaches a certain # of points it triggers the action.
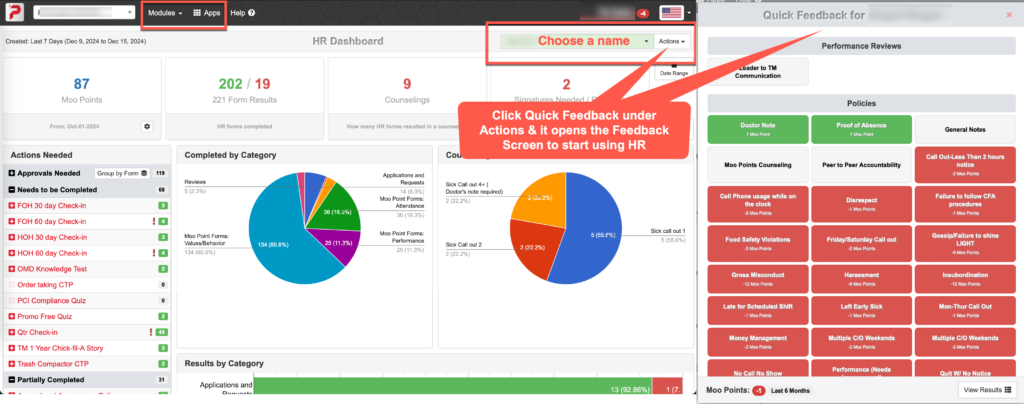
Step 5: Start using HRhere, This is your HR Dashboard and the Home page for HR. Tap Choose a name>Actions>Quickfeedback then apply praise or disciplinary action using one of the forms shown on Quick Feedback popup. The results can be seen by clicking the pie chart or red/green lines but individual results can be seen by choosing their name under “start here”. Step 4 Video
———————————————————————————————————————————————————————————————————————————————–
HR Videos