Printer Setup & Troubleshooting
- Initial Setup for a new Printer
- add 1 inch labels & follow this printer setup video. Your printer should print.
- NOTE: Remove & store the USB in a safe location. Do NOT leave it in the printer or it can cause it to not print!
- If your Printer Prints Blank labels
- be sure the label size is set to 1 X 1 & be sure to hit recalibrate after replacing labels! Here is video demo
- If your Printer does not print labels:
- Reboot your iPad then log back into vdown. We have seen this fix the issue.
- Try a different iPad. Older iPads that cannot be updated cause should not be used & cause connection issues.
- Make sure you are logged into the correct store if you have access to more than one store.
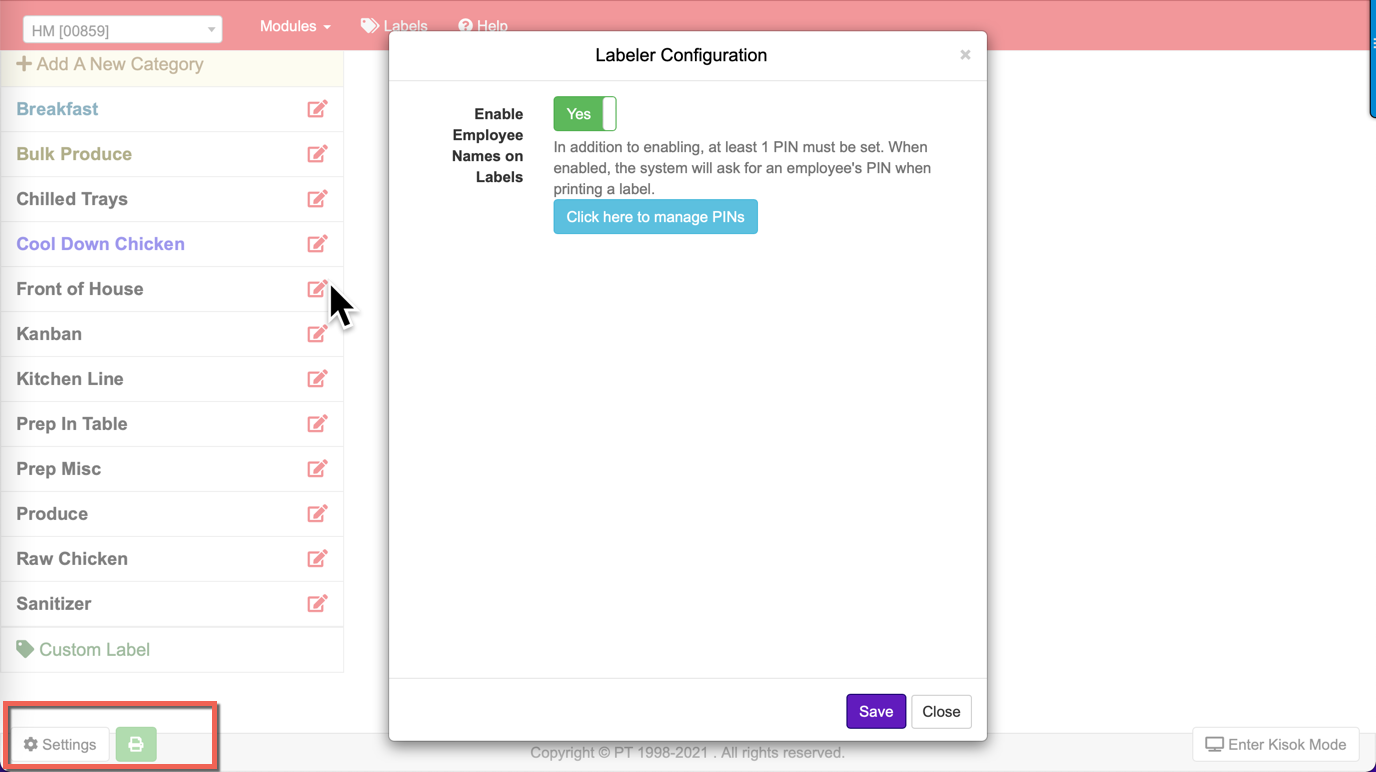
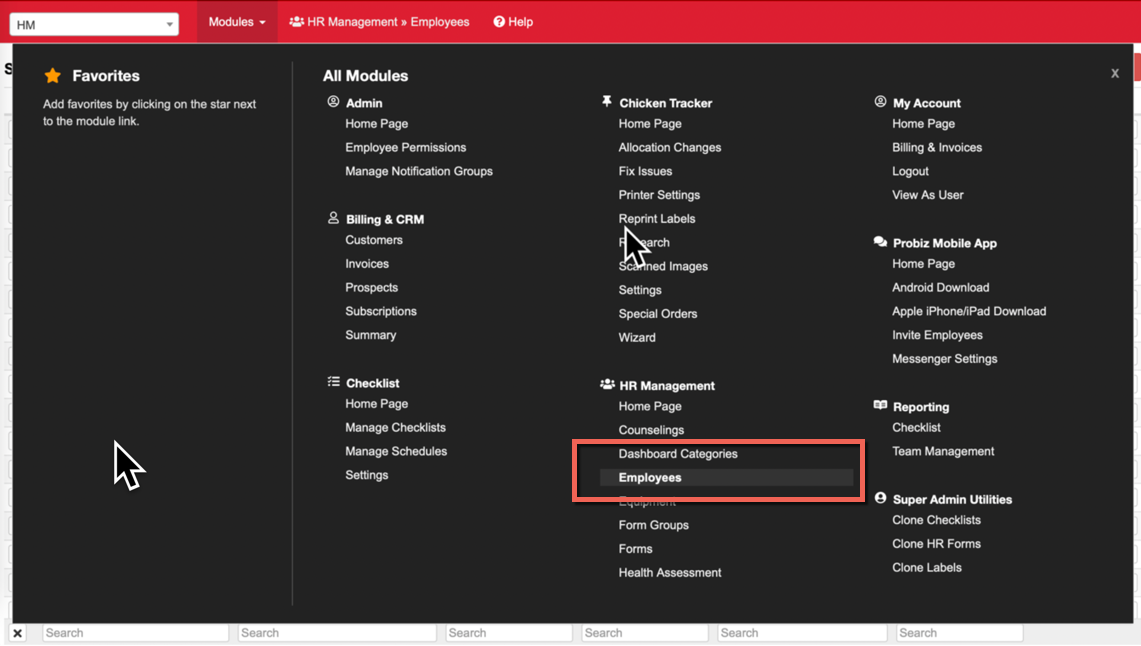
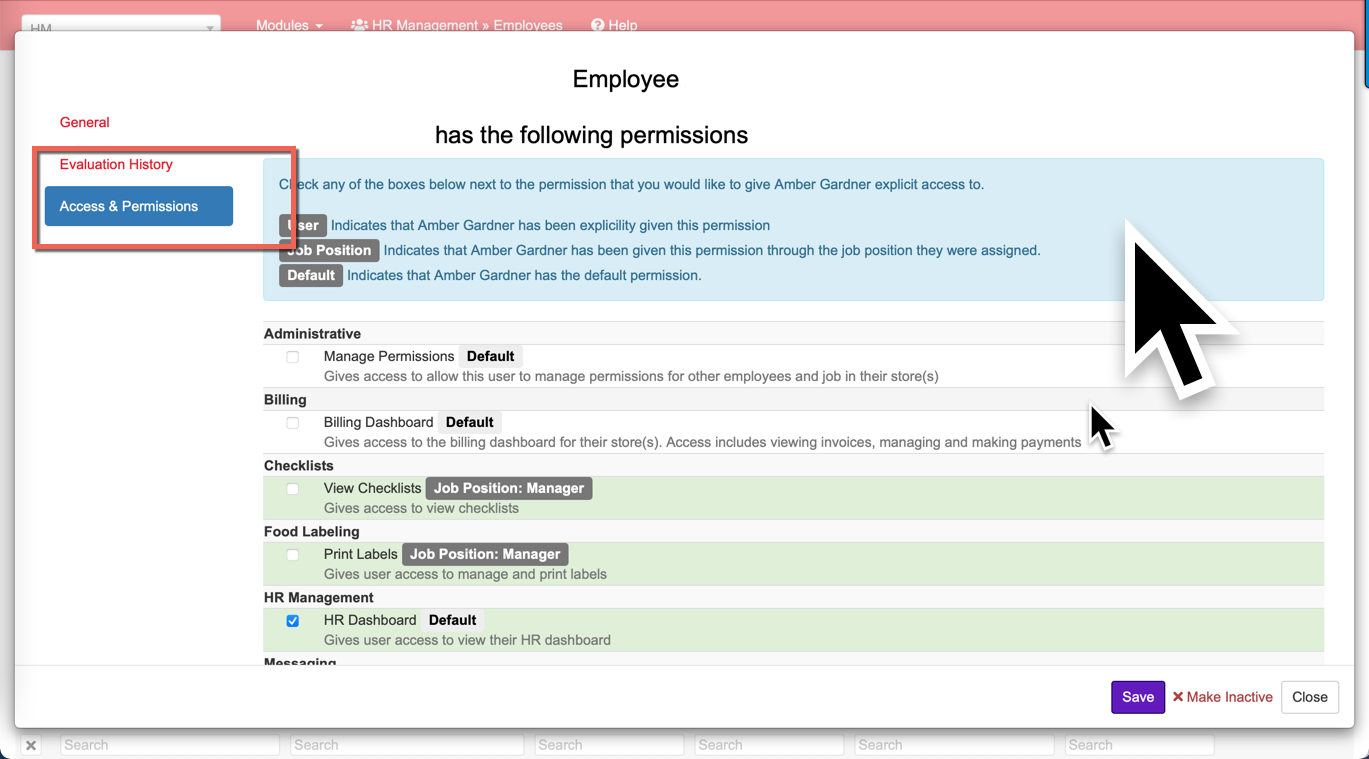
- Each company has an employee called Tasks under modules>HR Management>Employees that can be used for printing. You can stay logged in to Tasks for all users but if you want the employee names to print while using the Tasks employee you will need to have an admin login to Probiz by going to modules/labels/homepage then look for settings in the bottom left to enable pins. You can also have individuals login to printer but they will have to have this permission to print. To give that permission Go to Admin> Employee, tap name and tap permissions.
- If the printer light is green proceed to the next bullet point. If the light is red follow the new printer setup here.
- If the printer light is green but the printer is not printing follow Steps 1 – 4 below to be sure your IP address has not changed. We have seen power outage resets cause Printer IP conflicts meaning the printer configuration USB needs to be reconfigured. Don’t worry… It it not hard. This step should cure this problem. If you need help please Contact us here and we will call to help you get this going.
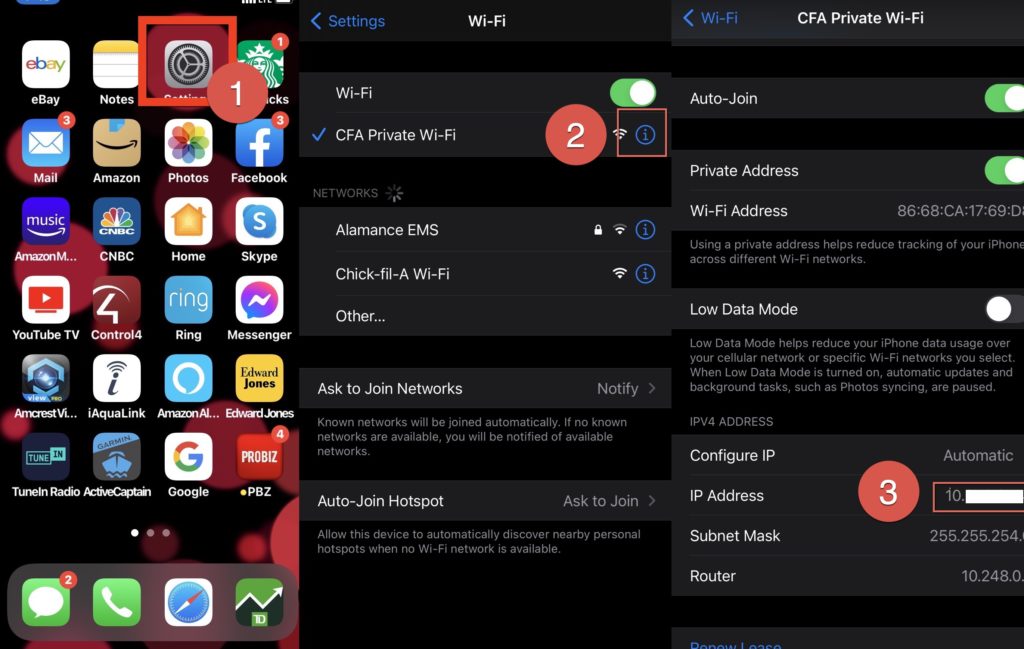
Step 1: On your iPhone click settings (1) and login to your private network, then click the i icon (2), and write down your IP, Subnet & Router address (3) so you can type the IP address in step 2 on Probiz website. (NOTE: The IP address is used reference only).
Step 2 – Login to tracker here and click on Printer config and chose your company (if not chosen for you). The IP address on your phone (step 1) and the one shown on this page should match. If it does not then type in the phone IP below and proceed to step 5.
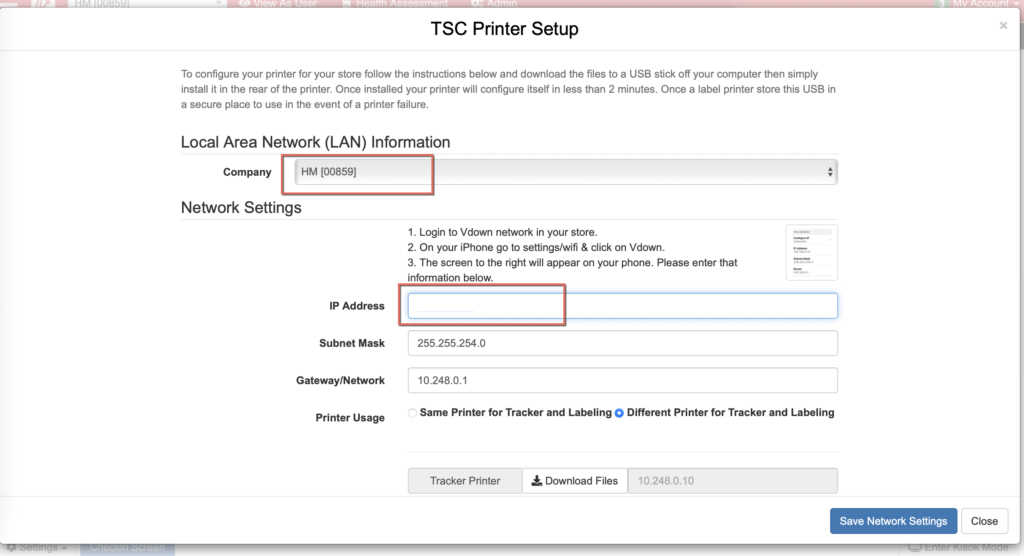
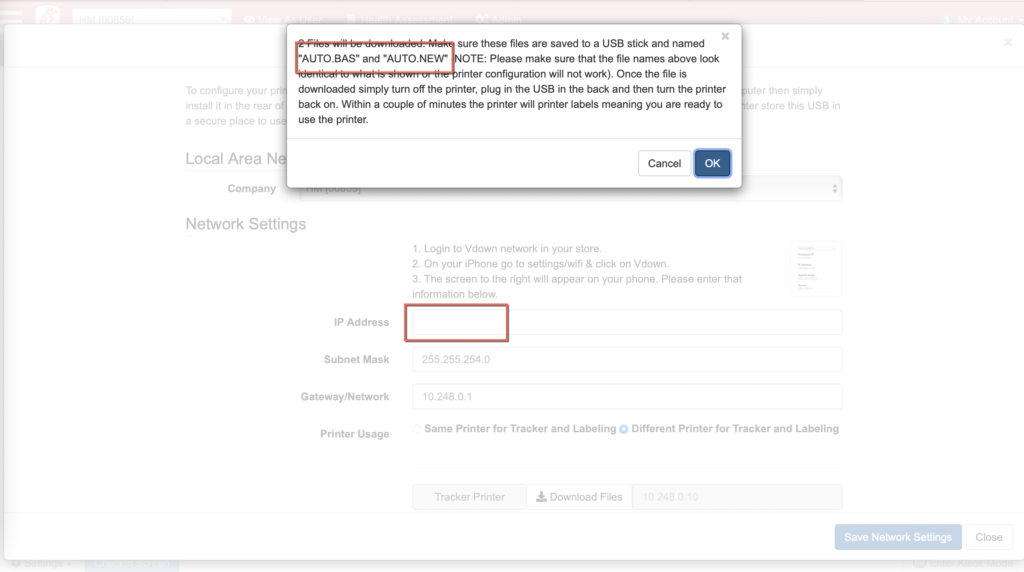
Step 3 – Put a clean USB stick in your computer and download the files to the USB stick. If the files downloaded on the USB are zipped then unzip them and discard the folder. You should see 2 files on your USB named “AUTO BAS” and “AUTO.NEW” and they must look exactly like this. Be careful not to hit download 2 times or you will see AUTO BAS (2) and the programming will not work. It will only work if the 2 files shown on the USB are “AUTO BAS” and “AUTO.NEW.
Step 4 – Plug in our printer then put the USB in the back of the printer and turn on our printer. The printer will print out labels in less than 2 minutes. It should work just like this video. BE SURE TO PUT the USB in your safe as you can use it to configure a new printer if you need one or if you add another module.
- Labels are off center or blank: go to modules then Chicken tracker or Labels then “Printer Settings” & tap label size or calibrate to reset both
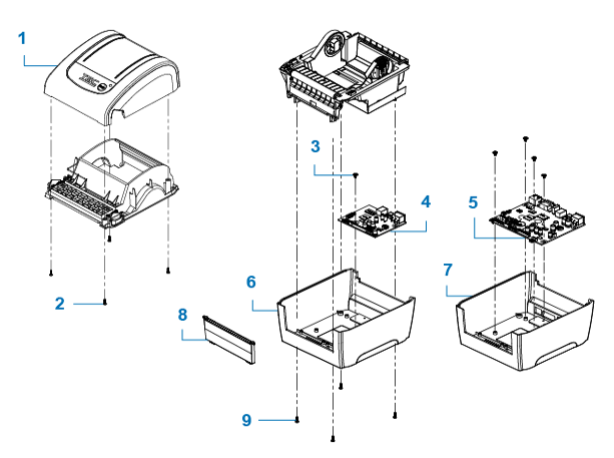
- Need Parts? Click here for available printer parts:
- Printer Warranty (2 years): If a printer fails there are 2 options: 1 – We will charge you for a new printer and send it out immediately. If the printer has failed during the 2 year warranty and the warranty department determines the issue is not moisture or physical damage you will be refunded. 2 – You can send the printer back to to our warranty department & wait for approval or denial of coverage.